With the introduction of microcomputers in smart meters, although the functions of the meters have been greatly enhanced, it has also added certain difficulties for diagnosing faults and troubleshooting (including fault diagnosis and processing of microcomputer hardware and software). This requires the use of smart instruments, maintenance personnel must have a certain degree of fault diagnosis, maintenance and maintenance knowledge.
Production Features:
Product Description:
FAQ: Scraper Type Chip Conveyor,Scrap Conveyor,Scraped Type Machine Chip Conveyor,Scraping Plate Type Chip Conveyor Hebei Hosan Machine Equipment Co.,Ltd , http://www.hosanmachinery.com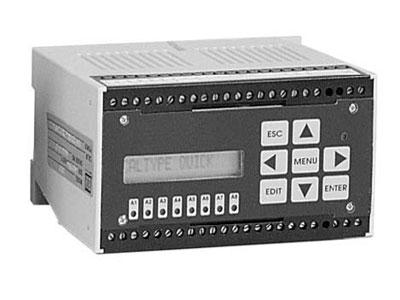
Types of Common Faults The types of faults of smart meters can generally be classified into hardware faults and software faults.
1. Common hardware failures (1) Logical errors Logical errors in instrument hardware are usually caused by design errors, process errors during processing, or other factors in use. This type of error mainly includes: wrong line, open circuit, short circuit, phase error, etc. Among them, short circuit is the most common and difficult to eliminate the fault. Smart meters often require a small size in the structural design, so that the wiring density of the printed circuit board is high, and the foreign matter in use often causes a short circuit between the leads and causes a failure. Open circuit faults are often caused by poor quality metallized holes in printed circuit boards or poor connector contact.
(2) Component failures There are two main reasons for component failures: First, the components themselves are damaged or have poor performance, such as: the type and parameters of the resistors and capacitors are not correct, the integrated circuit is damaged, and the device speed and power are Consumption and other technical parameters do not meet the requirements; Second, due to assembly failure caused by components, such as: capacitance, diodes, transistors, the polarity is wrong, the direction of the installation of integrated blocks and other errors.
(3) Unreliable reliability Many factors are unreliable in the system. For example, metallized holes and poor contact of the connector can cause the system to be in good or bad condition, cannot withstand vibration, internal and external interference, excessive ripple factor of the power supply, and devices. Excessive loads can cause unstable logic levels. In addition, unreasonable traces and layouts can cause poor system reliability.
(4) Power failure If the smart meter has a power failure, the device will be damaged after the power is turned on. The power supply fault includes: the voltage value does not meet the design requirements; the power outlet and the outlet do not correspond; the short circuit between the power supplies of each file; the transformer power is insufficient, the internal resistance is large, and the load capacity is poor.
2. Common software failures (1) Program runaway This failure phenomenon occurs when the breakpoint is run continuously. The target system does not operate according to the specified function or results are not available. This is due to the fact that the program has been transferred to an unanticipated place or looped somewhere. The reasons for this type of error are: miscalculation of the transfer address in the program, conflict of working registers, etc. When using a real-time multitasking operating system, the error may be in the operating system, and the correct task scheduling operation is not completed; in the high-priority task program, the CPU may appear to be stuck.
(2) Interrupt error 1 Does not respond to interrupts. The CPU does not respond to any interrupt or does not respond to an interrupt. This kind of erroneous phenomenon is that the continuous operation does not perform the specified operation of the interrupt service routine. When the breakpoint is set in the interrupt entry or interrupt service routine, it will not hit the breakpoint. Caused by the error are: the initial value of the interrupt control register (1E, IP) is set incorrectly, so that the CPU does not have an open interrupt or does not allow an interrupt source request; the extension of the special function registers such as on-chip timers, serial ports, etc. The I/O port is programmed with an error, causing the interrupt not to be activated; an interrupt service routine does not use the RETI instruction as the instruction to return to the main program. Although the CPU has returned to the main program, the internal interrupt status register is not cleared and thus does not respond. Interrupt; External interrupt request is disabled due to a hardware failure of the external interrupt.
2 loop response interrupted. This kind of failure is that the CPU cycles in response to an interrupt, making it impossible for the CPU to properly execute the main program or other interrupt service routines. Most of these errors occur in external interrupts. If the external interrupt requests the interrupt in level-triggered mode, the interrupt is not cleared by the interrupt service routine (for example, the 8251 transmit interrupt and the receive interrupt cannot be cleared when the 8251 is disturbed), or the interrupt is caused due to a hardware failure. Always active, the CPU will continue to respond to this interrupt.
(3) Input/output error. This type of error includes input operations that are cluttered or not at all. The reasons for the error are: the output program does not coordinate well with the I/O hardware (such as address errors, written control words, and specified I/O operation inconsistencies, etc.); there is no synchronization in time; there are also faults in the hardware.
In short, software failures are relatively hidden and easily overlooked. Finding them is generally difficult and often requires the tester to have substantial practical experience.
The basic method of fault diagnosis is that the microprocessor is introduced into the meter, which greatly enhances the functions of the smart meter, and at the same time it also makes it difficult to diagnose and troubleshoot the fault. First of all, it is difficult to determine whether the instrument fault belongs to a software fault or a hardware fault. This work requires the maintenance personnel to have a wealth of knowledge of microprocessor hardware and certain software programming techniques to correctly determine the cause of the fault and quickly eliminate it.
Although the self-diagnosis program can be used to locate the fault, any diagnostic program must be run in a certain environment, such as the environment where the power supply and microprocessor work normally. When the system failure has destroyed the environment and the self-diagnosis program itself fails to operate, it is naturally impossible to diagnose the fault. In addition, the results listed in the diagnostic program are not always the only ones and cannot be located on a specific site or chip. on. Therefore, if necessary, it should be supplemented with manual diagnosis to be effective. Here are some basic methods for diagnosing a fault.
1. When tapping and hand pressure instruments are used, the phenomenon of good or bad operation of the instrument is often encountered. This phenomenon is mostly caused by poor contact or welding. Hand pressure method."
The so-called knocking is to tap the board or component gently through a rubber hoe or other striker on the part that may be faulty to see if it will cause an error or stop failure. The so-called hand pressure is when the fault occurs, after the power is turned off, the plugged parts and plugs and sockets are re-pressed firmly by hand, and then the boot can try to eliminate the fault. If it is found that knocking the case is normal, it is best to re-insert all the plugs and try again; if the instrument is normal after the hand pressure, then the contact failure of the pressed parts or plugs will be excluded and try again; if the above method is still unsuccessful, Then use other methods.
2. Using the Sensing Method This method uses sight, smell, and touch to find faults and identify faults. In some cases, the damaged components will discolor, blistering, or burn spots; burned devices will produce some special odors; faulty chips will become very hot.
In addition, it is sometimes observed with the naked eye can also be welded or desoldering.
3. Plugging and Pulling Method The so-called "plugging and unplugging method" is a method of determining the cause of a fault by plugging and unplugging some plug-in boards and devices in a smart meter. If the meter returns to normal after removing a plug-in or device, it means that the fault occurred here.
4. Component exchange heuristics This method requires two instruments of the same type or sufficient spare parts. Replace a good spare with the same component on the failing machine and see if the fault is eliminated to find the faulty device or the faulty board.
5. Signal Comparison Method This method also requires two instruments of the same type, one of which must be operational. Use this method also has the necessary equipment, for example, multimeter, oscilloscope and so on. According to the nature of comparison, it can be divided into voltage comparison, waveform comparison, static resistance comparison, output comparison, and current comparison.
The specific approach is: let the faulty meter and the normal meter operate under the same conditions, then detect the signals of some points, and then compare the measured two signals. If it is different, it can be concluded that the fault is here.
This method requires maintenance personnel with considerable knowledge and skills.
6. Lifting temperature method Sometimes the instrument will work for a long time or in the summer when the operating temperature is high. Shutdown check is normal, stop for a period of time and then boot is also normal, but after a while there is a failure, this failure is due to poor performance of individual integrated circuits or components, high temperature characteristics of the parameters do not meet the requirements of the index. In order to find out the cause of the fault, a method of temperature rise and fall can be used.
The so-called cooling, that is, in the event of a failure, with a cotton swab to wipe the point where it may be a failure to make it cool, observe whether the failure is eliminated. The so-called warming is artificially raising the ambient temperature. For example, the heated soldering iron should be placed near the point of doubt (be careful not to raise the temperature too high to damage the normal device). Try to see if the fault occurs.
7. Riding shoulder method "riding shoulder method" is also called "parallel method." Install a good integrated circuit chip on the chip to be inspected, or connect good components (resistors, capacitors, diodes, transistors, etc.) in parallel with the components to be inspected to maintain good contact. If the fault is caused by open circuit or poor contact inside the device, this method can be used to eliminate it.
8. Capacitance Bypass Method When a circuit produces a strange phenomenon, such as a clutter on a display, the "Capacitance Bypass Method" can be used to identify the circuit portion in question. For example, the capacitor is connected across the power and ground of the integrated circuit; the transistor circuit is connected across the base input or the collector output, and the effect on the fault phenomenon is observed. If the capacitor's bypass input is inactive and its output is bypassed, the fault disappears and the problem occurs in this stage of the circuit.
9. Change the original state method In general, do not touch the components in the circuit before the fault is determined. This is especially true for adjustable components, such as potentiometers. However, if a reset reference measure is taken beforehand (for example, position mark or voltage value or resistance value is measured before being touched), it is allowed to be touched if necessary. After the change, the malfunction will be eliminated.
10. Fault isolation method The "fault isolation method" does not require comparison of the same type of equipment or spare parts, and it is safe and reliable. According to the fault detection flow chart, segmentation and enveloping gradually narrow down the fault search scope, and then cooperate with signal comparison, component exchange and other methods, generally the fault will be found quickly.
11. Use the tool diagnostic method to test, analyze, and judge integrated circuit chips, resistors, capacitors, diodes, transistors, thyristors, and other components using maintenance tools and test equipment. The main contents of the test observation are: signal waveform, current, voltage, frequency, phase and other parameters, and fault diagnosis is performed based on the obtained information.
12. Direct experience method Maintenance personnel have been familiar with the instrumentation system used for a certain period of time, and have accumulated rich experience in clearing what parts have characteristics, what is the normal phenomenon, and what is the abnormal phenomenon.
When the system fails, it is often possible to use direct observation methods, rely on maintenance experience, identify the fault and quickly ruled out.
13. Software diagnostics "Software diagnostics" is also an effective fault diagnosis method for smart meters. Usually smart meters have automatic fault diagnosis, which is implemented by pre-programmed software programs.
Intelligent instrument troubleshooting methods Some methods of fault diagnosis were described above, but the exact location of the diagnosis can only be said to have completed a large part of the maintenance work. The remaining 10% of the tasks were repairs. Even this small part of the work, if not valued, will fail to achieve the desired goal or even defeat it. This article focuses on the knowledge of some smart meter repairs. This knowledge is also applicable to the repair of any electronic product.
1. Remove the replaced component If you have diagnosed a component that is damaged or you suspect it has a problem, remove it from its original location. This work is easier for two terminals or integrated circuits with sockets, but for integrated circuit chips or multi-headed components that are soldered directly to the printed circuit board, such as transistors, relays, resistor banks, etc. Not easy. To remove these components generally can use the following methods.
(1) Use "Plastic straws", ie, sniffers without a soldering iron. The use process is: first use the electric iron to heat the solder to be removed until it melts, then aim the vacuum pipette against the hot solder, quickly remove the soldering iron, and at the same time relax the spring on the vacuum pump so that the solder can be sucked into the pipe for storage room.
(2) Using a large veterinary injection needle to grind it flat, heat the solder with a soldering iron to melt it, and quickly insert the needle into the terminal to separate the solder from the terminal.
(3) First contact the solder with a copper wire harness, then heat the copper beam near the solder joint. The copper beam heats up quickly, and the heat is transferred to the solder. The solder melts and enters the copper wire under capillary action. With the band, the solder is sucked away.
(4) Use a special tool called "ejector" and "welding head". To solder the chip, just insert the "lifter" on the chip and use the "welding head" to heat the back of the printed board. After the solder is completely melted, press the button above the "lifter". At this time, the spring plate generates an upward elastic force on the chip, and the chip will bounce off the circuit board.
2. After removing the solder residue and removing the components, there is inevitably residual solder in the circuit board hole. At this time, it can be heated to melt, and then quickly insert the toothpick or small nail into the hole to cool the solder and pull it out. This can keep the hole open for inserting the components later. Another way to remove the solder plugged in the solder hole is to use a micro drill bit to drill the solder hole through. However, in this method, all the debris generated by the drill hole must be removed. Can use a magnifying glass to conduct a careful inspection.
3. Repair the circuit board Before soldering new components, first check whether there are wires or soldering lugs that have been separated from the circuit board. If the wire is broken, the wire should be re-soldered and the 18# or 20# wire can be used. It is best to use the printed line with adhesive on the back to re-apply to the damaged place, scrape off the oxide layer on both ends of the new printing line so that it can be welded to the old line, and then remove all the excess tin particles. Pass through all the lead terminal holes that are filled with waste.
4. Checking Replaced Components It is necessary to check the replacement components before welding. This requires maintenance personnel with high theoretical knowledge and testing techniques, with the help of commonly used test instruments to test resistors, capacitors, diodes, transistors, and integrated circuit chips.
A simpler method can also be used to insert the terminals of the chip and other components into the corresponding solder holes, and plug it with a toothpick, and then power up. If the function is normal, you can remove the toothpick and weld the components.
5. Welding There is no doubt that manual welding is one of the easiest tasks in electronic maintenance and the easiest to operate. Many people not only have poor welding techniques, but they also often use the wrong iron. Welding is not simply simply linking the two metals together. Its correct meaning is to melt and combine the two metals into a secure electrical connection that is mechanically connected. In this process, the time and temperature requirements are very strict. When the iron is used properly, manual welding is usually completed within 1.5 s or less.
In order to clean the greasy, dusty or oxide layer of the solder joint, a good quality clean flux should be used. The key to successful soldering is soldering iron. To select a soldering iron whose working temperature is compatible with the circuit board to be repaired, it is not correct to use a soldering iron whose power is too low or too high. The tip should be as large as possible but slightly smaller than the component being soldered. In order to prevent the iron head from being oxidized and corroded, the soldering tip is applied with a layer of tin at any time during use. This can not only accelerate the heat conduction but also prevent it from being oxidized. The old welding head is always black and dirty, and has pits that are corroded. Its thermal conductivity is not so good. It should be rubbed with sandpaper, tin be reheated, and it can be used again.
When the soldering tip is not yet cooled, wipe it with a wet sponge, which is a wrong method, which wipes off its protective layer and exposes the surface of the soldering tip to oxidation in the air. The best way is to burn some new tin.
6. After commissioning and repairing, some parameters should be re-commissioned and trial run so that after maintenance, the instrument's performance indicators are consistent with the original product.
Only in this way, the entire maintenance task will be completed, otherwise it will have to be repaired again.


What are your advantages?
We perfect every detail. We only supply high quality Chain plate scraped conveyors chip conveyor for cnc machine , and a four-member professional team will be sincerely at your service anytime. All your problems would be very efficiently.
Are you a manufacturer or a distributor?
We are a manufacturer as well as a trading company, so we can ensure , and also we could assist you purchase other products by virtue of our excellent trading power.
Can your send us samples for testing?
Yes, samples in small quantity would be free of charge, but freight should be paid in advance or freight collect. Quality of the products you`ll purchase would be the same as that of samples.
What's your payment terms?
T/T, L/C at sight. Western Union any Paypal are also available if it is convenient for you.
How about the delivery time?
Within 3-7 days for stock goods, 10-25 day for customized products after receiving the prepayment or relevant L/C.
How do you pack the good?
Standard wooden case.
Could you print on the products as per our requests?
Yes,we could print images or words on the products, such as your logo, brand etc, if you buy in bulk.